Showing posts with label glass tiles. Show all posts

Wednesday, November 12, 2014

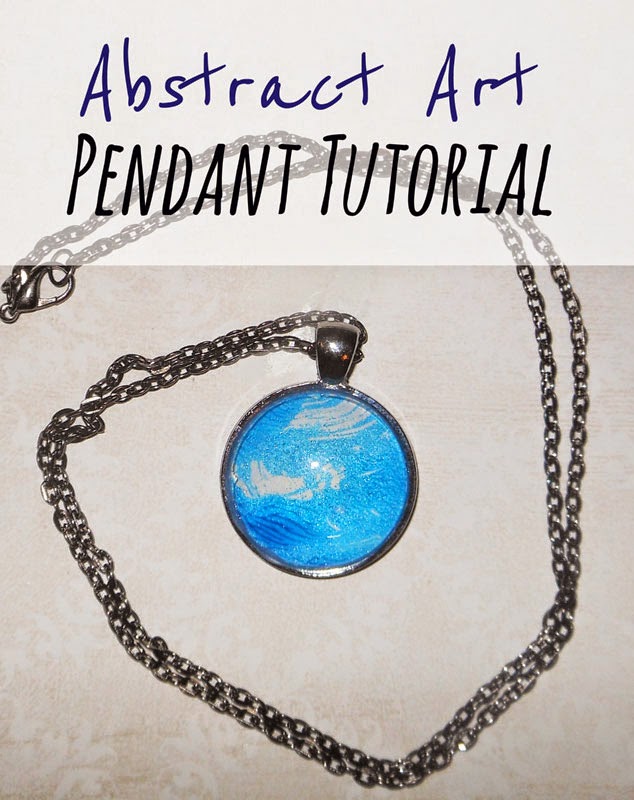
Abstract Art Pendant Tutorial


Last night, I decided to make an icy blue pendant to capture the cold Minnesota weather. As I made this, I was wrapped in a blanket cocoon, because I am quite certain my craft room barely reaches 60 degrees in the winter (technically it's still fall, but nature doesn't seem to care about that right now). Stupid old houses and their draftiness.

Materials Needed:

To start, squeeze a little dimensional glaze onto the glass piece. Then place the glass onto your art. Gently push down and make sure there are no bubbles under the glass. You can use any clear glue you want in place of the dimensional glaze, if you are feeling cheap. I used Tacky glue when I first experimented with this project, and it works decently. The main difference is that dimensional glaze is less likely to create air bubbles under the glass. So if you are picky, use a dimensional glaze. 

Let the glaze dry for a while. I think I waited an hour. Then trim off the excess paper. Next you will need to seal the back of the paper with more glaze. Use the tip of the bottle to spread a small amount of glaze onto the paper. 


Let this dry for another hour or so. Next, you will put more glaze on the back of the paper. Turn the glass over, and place it into your pendant tray. Allow to dry, again. There's a lot of dry time with this project. Maybe find other things to do in the spare time. Like make a matching pair of earrings! 


I used a 24 inch gunmetal chain for this pendant. 


And would you look at that! A matching set of paper earrings. Stay tuned for that tutorial. (Update: Here it is! Abstract Art Paper Earrings Tutorial)


If you have any questions or comments, please leave them below. I would love to hear from you and see what projects you are up to! If you enjoyed working with the glass pieces, you can take a look at some of my other tutorials like the ones listed below. 

Abstract Art Pendant Earrings Tutorial (You could easily make matching earrings with this tutorial!)

Sunday, October 5, 2014

Abstract Art Pendant Earrings Tutorial


Last fall, I discovered a love for making jewelry. Seeing that the leaves are changing again, I wanted to use fall colors to make a new set of pendant earrings. These earrings require a few steps so it may not be the best tutorial for impatient people, but I encourage you to check them out anyway!

Materials needed:
   Pendants

  • 12 mm glass cabochons
  • 13 mm pendant tray (I like the gunmetal trays)
  • dimensional glaze or any clear drying glue (I've used Tacky glue, which works fine, but dimensional glaze is less likely to form bubbles or pull away from the glass as it dries.)
  • some type of art or photo. You can use my Abstract Art Technique to have a funkier earring, or print something on card stock. Maybe even try magazine photos!)
  • scissors or X-acto knife
   Wire Designs and Jump Rings
Begin by gluing your glass cabochons to the art/photo of your choosing. I used acrylic paints to make this design. I love the addition of the shimmery gold paint. 


I use a small amount of glue on the cabochon and lightly press it onto the paper. Cut the glued section of paper out and leave to dry for an hour or so. (While you wait, you can begin working on the wire designs.) I cut the section out with an X-acto knife to keep the paper from rippling and pushing the cabochon off as the glue dries. You can use a scissors if you don't mind cutting through potential designs.


Once the glue dries, trim the excess paper from the cabochons with a scissors. Seal the backs with more glaze or glue. You can use an old brush or use the glue bottle's applicator tip to spread the glue. Leave to dry for another hour, or until the glue isn't tacky anymore.


Next, apply more glue/glaze and press the cabochon into the pendant tray. I like to have a little glue squeeze into the gap between the tray wall and the glass. Allow the glass to dry for a little while before assembling the earrings. If you are impatient, you can assemble now--that's what I did, but I don't advise it. 


Repeat this for the second earring. I encourage you to fiddle with different designs. I like to buy the bigger rolls of cheap wire so that I can experiment with different designs and not feel guilty about wasting wire. 

You will also need two jump rings. If you have them on hand, great. Otherwise use the next image to make your own. I used to buy jump rings, but now I make them all as I need them. Basically, just wrap the wire around your round nose pliers until the wire starts to stack, and then cut. 


Now, let's assemble the earrings. Open the ear hook loop with your flat nose and round nose pliers. Place the wire design in the loop, and then close tightly. Open your jump rings the same way, and connect the pendant to the wire design. Assembly is the best part, because it requires the least steps. 


And now you have an awesome pair of earrings! I love the different colors and different designs that can be created by using these materials. Below are two more examples I made. 


Please let me know if you have questions or comments! I hope you give these a try. If you enjoy using the glass cabochons, then check out my refrigerator magnet tutorial!

Thursday, October 2, 2014

Abstract Art Technique for Craft Projects


I started doing this art technique when I was taking art classes in college. I was in love with the way paint acted when you transferred it from one surface to another. It's like a temporary paint stamp.

Materials needed:

  • acrylic paint in whatever colors you choose
  • a piece of plastic or a sheet of transparency. I have used plastic wrap, but I wanted a more rigid surface. You can really use any smooth, non-permeable surface. Tip- you can buy individual sheets of transparencies for about ten cents at FedEx Kinkos. 
  • Paper- I use card stock or thicker drawing paper, 60lb or heavier in weight. 
  • Paint brush(es)- depending on the texture you want. You can even use your fingers, sticks, or anything else you feel like using. 
  • Water
  • pens (optional) I like black fine liner pens. Sharpie or Micron are good. Don't used water based pens if you plan on using this for glass tile projects. The glue/glaze can make water based ink run and blur. 
I start by putting a few blobs of paint on the transparency. You can see in the picture that I have the transparency sitting on top of my paper. This helps me see the textures I am creating a bit more easily. I start to fiddle with the colors. Mix them together, put a little water on to get a smoother consistency. You want to work fast or keep the paint moist by adding water. You could even get a spray bottle of water and spritz the surface if you are working in a dry environment. 


Once you get the textures you want, flip the transparency over onto your paper and smooth the paint down with your hands. Don't rub too hard in isolated spots because it might change the shapes you created. If your paint is thick in certain spots, it will ripple when you pull the transparency off. It looks kind of cool when it does that. It looks sort of like veins. 


I like to work with the transparency a couple of times. Once I pull the film off, I lay it back down and moisten the surface with my brush while creating new textures and patters. You can put more paint down if you need it. 


Once I am satisfied with the results, I wipe the transparency with a wet paper towel or rinse if off in my kitchen sink so that I can use it again. After the paint dries you can take a black pen and start 'pulling' out shapes from chaos. 


There are so many possibilities with color, shape and texture using this technique. I hope you have fun with it and please share any questions or comments you may have. If you want to put this technique to good use, try making magnets like these


DIY Abstract Art Refrigerator Magnets


Cute refrigerator magnets are a must when you move into a new place. When Jake and I bought our house, I wanted something other than local business magnets. They are kind of ugly, and plus they don't do jack when it comes to holding things up. During this time, I was a cashier at a craft store and saw so many glass tiles go through the register I figured I would just make my own glass magnets. The only issue would be the what I wanted the magnets to look like.

For a while, I had been experimenting with abstract paint swirls for my art, and I had a bunch of left over 'test' pieces which worked perfectly for this project (and other projects with glass tiles like pendants, earrings, key chains, etc.). If you want to see how I made my abstract art sheets, click here.

Materials needed:

  • glass tiles- I used 1 inch circles and 1 inch squares. You may be able to find the glass tiles at a local craft store, but I bet you they are double or triple the price. 
  • magnets-I bought a 10 pack from Joann's but these rare earth magnets work too. Ceramic magnets are bigger and less powerful than the rare earth magnets, so if you want power, go for the latter. 
  • dimensional glaze- you can use Tacky glue or any glue that dries clear as long as you don't mind bubbles. The dimensional glaze is for picky people. 
  • scissors or X-acto knife
  • glue- I used Loctite Power Grab, but E-6000 works too. I prefer not to use anything that needs ventilation or says it causes cancer--but maybe that's just me. 
  • small old paint brush
  • art or any printed image (use heavier paper like card stock or photo paper) Click here for my abstract art tutorial. 


To begin, you will be gluing the glass tiles to your paper. I start by putting dimensional glaze on my tile and spreading it around with the glue applicator. Then press the tile down on the paper. If glaze/glue oozes out the sides then use less glue for the next tile. If you have a lot of air bubbles try pushing the tile down a little harder or adding more glaze/glue. 

After you have your tiles glued, cut them out, leaving a little excess paper to be trimmed later. I use an X-acto knife so that I can preserve the paper for later use, but a scissors works fine if you don'e mind cutting through unused parts of your art. I like to cut out these small sections just in case the paper warps and lifts the tile off the page. I've had it happen and I was very peeved. 


Leave your tiles to dry for a little while. Maybe an hour. Then trim off the excess paper with your scissors. Next, you need to seal the backs of the paper with more glaze/glue. I squirt some glaze down and then spread it out with an old paint brush. If you are using the dimensional glaze, try to not get it on your fingers, because that stuff is sticky. My fingers were tacky all night because I couldn't get it to wash off (little tip, try rubbing oil on your fingers if they do get sticky.) You only need a thin layer of glaze to seal the surface. Let it dry for another 30 minutes to an hour.


Once the backs are dry, you can glue your magnets on. I squeeze a little Power Grab glue on the magnet and then push it down onto the tile until a little glue squeezes around the sides. If you are using the quarter inch rare earth magnets, maybe use a tweezers to hold the magnet so you don't get glue all over your fingers. A quarter of an inch isn't a lot to work with.  

Once all of your magnets are in place, allow this to dry for as long as the glue tells you to. The Loctite glue sets in 15 minutes, but I let it dry over night. Once they dry, you are ready to stick them to your refrigerator! These magnets are awesome little gifts for people, and they are fun to make! 


As always, leave questions and comments below (if you have any!). Thanks for checking this post! Stay tuned for other random projects. You never know what I am going to feel like doing.