

Since I started making my own earrings, I have an abundance of display frames that I use at craft fairs, but none for my own earrings to wear. I've just been accumulating a pile of earrings in the bathroom with the hopes that they wouldn't tangle. It wasn't working very well. I decided to use some extra lumber to make my own earring holder that will fit in the bathroom cabinet.
I used 2x1 cedar lumber and cut it with a miter saw. You can make the frame any size you want, but I chose to make a smaller one and cut 9 inch or smaller pieces.

Tools needed:
- something to saw your wood with
- stapler and staples
- hammer
- tape measure
- 1 1/4 inch nails
- scissors
- screen/metal mesh material/chicken wire (I used stiff window screen)
Optional Tools:
- hinges (1 1/2 inch)
- drill
- screws
- paint
Lumber Needed
- 2x1 cedar lumber or 2x1 furring strips (the furring strips aren't as neat and smooth, but they are cheap and work well if you don't mind imperfections)
To start, figure out what size you want your frames to be and calculate how much lumber you need. I cut two 9 inch sides and two 8.5 inch tops for each frame and needed four frames. In total, I needed eight 9 inch pieces and eight 8.5 inch pieces. I had one eight foot piece of cedar 2x1 and one four foot piece on hand and that covered my needs. Well, kind of. I realized I was going to run out of wood if I cut four more 8.5 inch pieces so I actually had to shorten them slightly to have enough lumber. It's okay. I'm not a perfectionist. So that's why the D and B frames look a smidgen smaller.

After you have your pieces cut, assemble the sides and staple the corners like the picture above. If you really wanted you could be all fancy and cut 45 degree angles with a miter saw, so the frames fit together like a picture frame, but I wasn't feeling fancy. Two staples on each corner worked for me. I pounded them in with my hammer if they stuck up a bit.
Once you have the four corners stapled, flip the frame over and staple the back side corners as well for extra security. The frames are not strong enough to have one side of staples only. I'm sure there is a better way to do this and a carpenter is shaking his/her head somewhere at me, but I make do with what I've got.

After I stapled the frames, I painted everything. I used extra paint from the bathroom vanity I painted a few weeks ago. Paint one side of the frames and allow to dry for a few hours. I started this at 10PM and went to bed after the first sides were painted. When I woke up in the morning I paint the other sides. You really only need one coat of paint if you are using interior paint like this. You could also use craft paint. It dries much faster and you can play around with brighter colors for cheap.
Once your paint is dry, cut two pieces of screen to fit over your frames. I cut the piece a little smaller than the frame so that no screen sticks out of the final frame. Those wires are sharp! Staple the screen to the frame, pulling it tight as you work your way around.

You will only be putting screen on two frames. Once you have that finished, place the screenless frames on top of the screen frames.
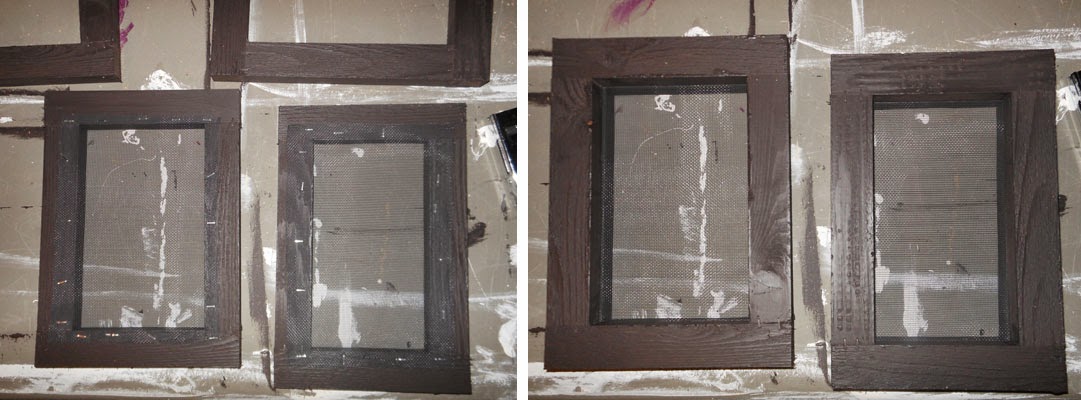
Using one nail for each corner, hammer the two frames together. Now if you don't want to hinge your earring holders together then this is your finished product:

I use four holders like this for craft shows and have them sitting flat on my tables. But, if you want your earring holders hinged together then keep going!
Stack your frames together with your 'display' sides facing each other. I like the nails in the corners showing so I put those two sides together. Turn your frames on the side you want hinges on and position the hinges.

I just eyeballed where I thought they looked good and screwed them him with a drill. Now flip the frames over and open them up. You are now ready to organize your earrings!

I have used scraps of mat board to nail to the backs of the frames to give the holders more of a boxed in feel, but since I have some stud earrings in my collection, it's easier to keep the backs of the frames open so I can secure the studs with rubber backs. It's up to you, though. For my craft fair frames, I definitely use the mat board backing.

Let me know if you have any questions or comments below!
No comments:
Post a Comment